Analyzing and Creating Memorials | Facing History & Ourselves
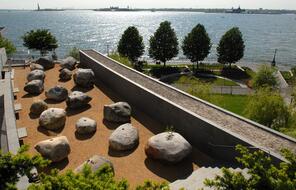
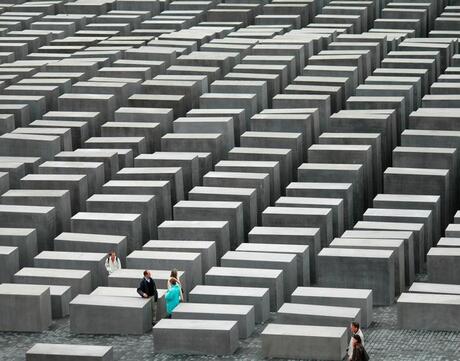
The Memorial to the Murdered Jews of Europe, or Holocaust Memorial, is a memorial in Berlin, Germany to the Jewish victims of the Holocaust.
Lesson

Analyzing and Creating Memorials

Students learn about several Holocaust memorials around the world in preparation to design their own memorial.

Published:

At a Glance

lesson copy
Lesson

Language

English — US

Subject

  • Civics & Citizenship
  • Social Studies

Grade

6–12

Duration

Two 50-min class periods
  • The Holocaust

Overview

About This Lesson

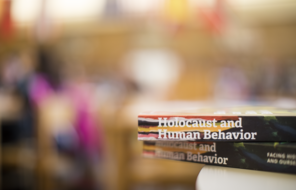
This lesson complements the resources in Chapter 11 of Holocaust and Human Behavior by engaging students in the processes of both responding to and creating memorials to the Holocaust. By doing so, they are forced to grapple with key questions about why history is important and how our memory of history is shaped and influenced. Students will begin by learning about several Holocaust memorials around the world and analyzing the choices that artists and communities made when creating them. Then they will design, plan, and create their own memorial to represent an idea, event, or person they believe is important to remember from the history of the Holocaust.

  • What is the purpose of memorials and monuments? What impact do they have on us and the way we think about history?
  • What parts of the history of the Holocaust are most important for us to remember today? How can we ensure that this history is not forgotten?
  • Students will understand that through memorials, communities and individuals seek to shape future generations’ understanding of history.
  • Students will understand that when creating memorials, artists and communities make choices about what aspects of a particular history are worth remembering and what parts to leave out.

This lesson is designed to fit into two 50-minute class period and includes:

  • 3 activities 
  • 1 handout
  • 1 reading

Preparing to Teach

Save this resource for easy access later.

Save resources to create collections for your class or to review later. It's fast, easy, and free!
Have a Workspace already? Log In

Lesson Plans

Activities

Before engaging more directly with memorials to the Holocaust, it is helpful to introduce and define the purpose of memorials and monuments more generally, using some examples with which students are already familiar.

  • Ask students to identify a memorial in their community. (You might even ask them to visit one for homework before this lesson.)
  • Ask students to describe in their journals the memorial or monument they selected. They might also sketch it or tape a photograph into their journals. Their description should answer the following basic questions: What is it? What does it look like? Where is it, and what is around it? What does its purpose seem to be?
  • Lead a brief class discussion in which students share some of their examples, and then focus on the following question: Why might people want to build memorials? List as many reasons as the class can brainstorm. (Use the Think, Pair, Share teaching strategy.)

Tell students that in the decades since the Holocaust, numerous communities and artists have built memorials to commemorate that history. In this activity, they will look at some examples and then briefly analyze one particular memorial.

  • Before looking at the images of memorials, read aloud the introduction to the Chapter 6 visual essay, Memorials and Monuments.
  • Ask students to look over the images of memorials in the visual essay and then pick one to analyze. In their journals, have them answer the following questions, using what they observe in the image and the information in the caption, if necessary:
    • What is it about this memorial that prompted you to choose it to analyze?
    • Who is the intended audience for the memorial?
    • What, specifically, is the memorial representing or commemorating?
    • What story or message do you think the artist was trying to convey to the intended audience? What might the memorial be leaving out?
    • How does the memorial convey its intended story or message? What materials did the artist use? What experience did the artist create for the audience?
  • After students complete their individual analyses, have them share their responses, using the Think, Pair, Share strategy once more.

Now ask students to design and create their own memorials to the Holocaust.

  • The handout Creating a Memorial provides some general guidelines to help students think through this project, but you may need to modify or adapt those guidelines to take into account the materials you have on hand for students to use in building their memorials. Some teachers have students use modeling clay, construction paper, or similar materials for their memorials, while others simply have students create a sketch or diagram of the memorial without building it.
  • Regardless of the form their final product takes, students should write a short artist’s statement to accompany their memorial, describing the inspiration for the memorial, their intended audience (and where they envision the audience encountering the memorial), and the message they aim to convey.
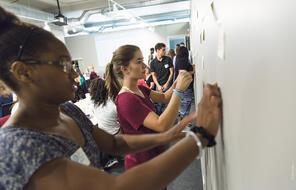
  • Once the memorials are complete, use the Gallery Walk strategy to arrange them so that students can observe and analyze each other’s work.

Materials and Downloads

You might also be interested in…

Unlimited Access to Learning. More Added Every Month.

Facing History & Ourselves is designed for educators who want to help students explore identity, think critically, grow emotionally, act ethically, and participate in civic life. It’s hard work, so we’ve developed some go-to professional learning opportunities to help you along the way.

The resources I’m getting from my colleagues through Facing History have been just invaluable.
— Claudia Bautista, Santa Monica, Calif